


When it’s time to install home security, one of the first questions asked is how to install security cameras. While installing a security camera can be simple, many considerations go into the process. Understanding the steps involved will help you decide whether this is a project you want to do yourself or if you wish to hire pros.
Basic Security Camera Equipment You Should Understand
Let’s start with the basics. Understanding the equipment and making the best choice for your home are among the most challenging aspects of setting up home security cameras. ONIT Home works with popular home security system manufacturers to offer an array of equipment, and our team can help you navigate these choices.
If you want to DIY it, it’s helpful to understand your options.
The Cameras:
- Wired: These are traditional systems that use a physical data storage device, like a DVR, and have wires running from the cameras to a central system.
- Wireless: These use your home’s wi-fi to transmit video footage. Some require a power outlet to operate.
- Wire-Free: Often labeled wireless, they require no power outlet. They use batteries instead and operate on your wi-fi system.
- Game Cameras: Usually have their own data storage and operate on a battery. Useful for areas away from wi-fi and power, like sheds or other structures you want to keep an eye on.
Camera Features:
- Tilt and Zoom: This allows you to adjust the camera remotely
- Wide Angle: The wider the angle, the more area you can capture in recordings.
- HD: Improved video capture quality.
- Motion Detection: Starts the camera recording when motion is detected, usually sending a push alert to your phone.
- Weatherproof/Outdoor: Designed to withstand harsher conditions. There are different levels of weather resistance.
- Night Vision: Able to capture images in low- or no-light environments.
- Indoor: Designed for indoor use and not suitable for harsher outdoor conditions. Generally cheaper as a result.
- Remote Viewing/Live Stream: The ability to watch the camera’s feed remotely.
Additional Equipment:
- DVR or NVR (Network video recorder for wireless systems) to record and store captured footage.
- Weather shields for vulnerable outdoor cameras.
What About Security Camera Service?
You can ask your service provider a few key questions to determine if they’ll be best suited for your needs.
Will the Monitoring Service Contact You About the Event Before Alerting Law Enforcement?
- How long after no contact with you do they reach out to emergency services?
- Will the system offer notifications when an event happens?
- Can you view the footage remotely?
- Can you view the stream live?
Which Security Camera Type is Best?
When is Wired Best?
When you have to cover a large property, they retain crisp images even further from the receiver as long as the wiring is in good shape. They also are often hardwired to a power source, so there are no batteries. However, they are usually more expensive and harder to install.
When is Wireless Best?
Wireless is best when the area you want to monitor is within wi-fi range. They often use cloud storage, which requires less equipment and is, therefore, less expensive. The downside is that the image can be fuzzy when connecting away from the source. Wire-free cameras require no power outlet, so they have the most flexibility, but you’ll need to replace batteries, be mindful of that when positioning them.
Is It Hard to Install Security Cams Yourself?
The biggest challenge in learning how to install security cameras is sorting out what equipment will work best for your situation. For the most part, installing is not hard. Some quick facts:
- Average time: 2-8 hours, depending on the size of the system and the complexity.
- Cost: Highly variable, ranging from as low as $25 per camera up to over $1,000 for high-end security equipment
- Tools Needed: Ladder, drill, spade bit (for wired systems), Phillips screwdriver. For brick walls, a masonry drill bit and hammer drill.
Tips & Tricks for Home Security Camera Installation
A few common tips will help ease the process when considering how to install security cameras.
- Plan ahead. Make a map of your home and note the vulnerable areas. Doors, large windows away from the street, stairwells, garages, and porches are most susceptible.
- Visit each area with a vulnerability. Look for available power outlets. For outdoor locations, consider weather protection and light sources.
- Research equipment. With an idea of your home’s needs, look for equipment that will suit your unique situation.
- Map the System. Once you choose between wired or wireless, map out the location of each camera before you begin working. For wired systems, determine the wiring route and measure the distance so you’ll have enough wire.
- Remember, don’t put cameras in private areas like bathrooms and bedrooms. For added security in those spaces, consider glass break sensors.
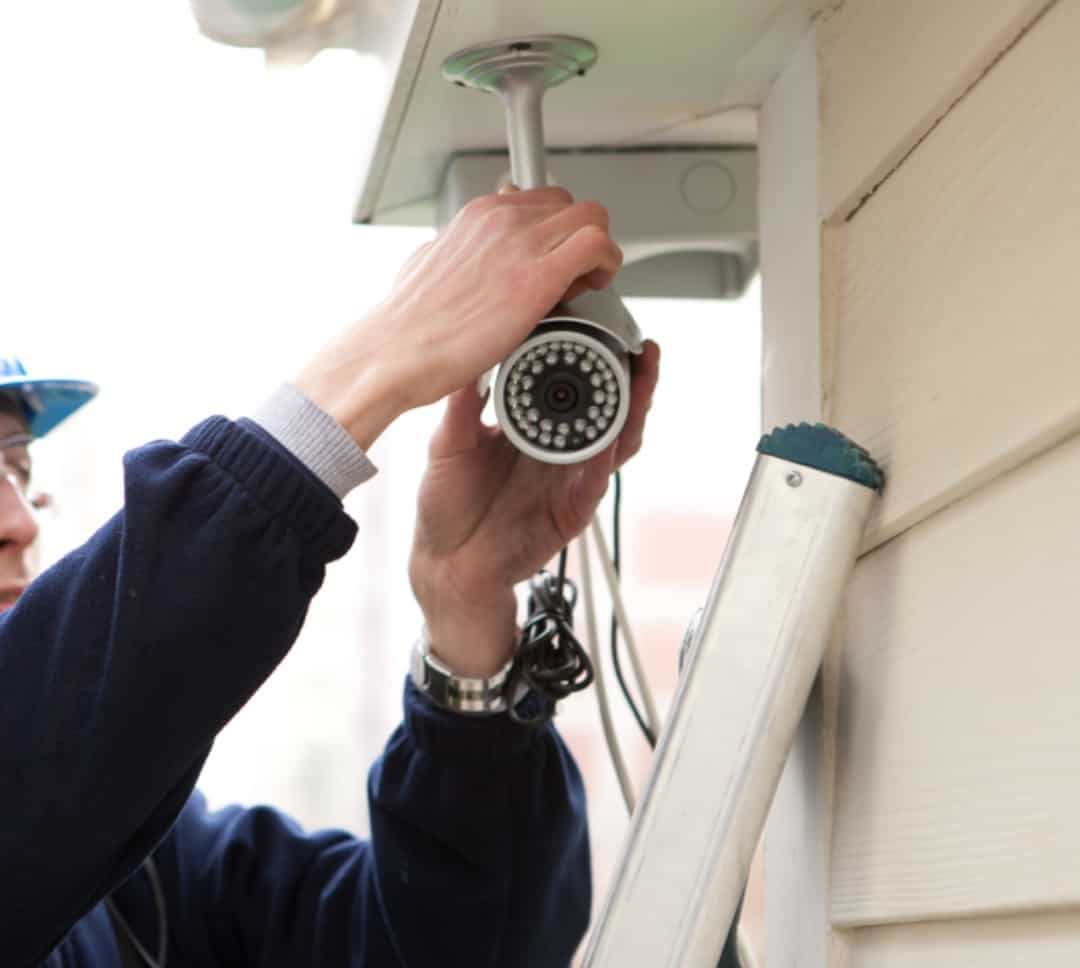
How To Install Security Cameras
Install the Mount
Most cameras are installed by connecting the mount first. To do so, you’ll use the included template (or the mount itself) to position pilot holes. Drill, install mounting pins with a hammer, then screw in the mount.
Wired systems may require that you drill through the wall using a spade bit and feed cable to the location where the camera will live. Use fish tape to help feed cables through tight spots and behind walls.
Install the Camera
If using wired cameras, connect the cable to the camera. Connect to a power source or install new batteries. Securely affix the camera to its mount.
Connecting to the Network
Wired: Ensure each input cable for wired systems is secured to the DVR – it’s a good idea to note which input port belongs to each camera. Connect the DVR to a monitor to observe the feeds.
Wireless: Install the software. Please make a note of the IP address for the wireless camera; this will allow you to view its feed remotely by entering that address into any web browser.
Installing Security Cameras Without Drilling
In some situations, it may not be possible or allowable to drill into your walls to install a security camera. Knowing how to install security cameras without drilling is vital in those situations.
- Wireless cameras are often better for those in apartments or temporary spaces. No drilling is needed. Instead, consider wire-free cameras. Since these have internal power and use wi-fi to set up, you can use a sticky pad like 3M tape – usually included with the installation kit – to set these up.
Best Places for Inside Security Cams
Remember, only install security cameras in common areas, and avoid rooms like bathrooms or bedrooms. Use glass break sensors in these rooms. Otherwise, consider the following:
- Primary gathering spaces, particularly those with large windows that are not street-facing.
- Consider a camera in hallways to monitor bedroom break-ins without privacy violations.
- Position in corners for the widest field of view.
- Place it high and out of reach of kids and burglars whenever possible.
Best Places for Outdoor Security Cameras
Positioning your outdoor cameras requires more consideration than your indoor cameras. A few tips will make the process pain-free.
- If your cameras need a power source, ensure an outlet is nearby.
- Consider weather-protection. Consider weather shielding or a weatherproof camera if no protected spot is available.
- Consider lighting. Without light, your camera will not pick up images. If you elect for night vision cameras, place them away from bright lights like street lamps, diluting their ability to capture images.
- Your camera should observe critical areas. This includes all points of entry, side windows, stairwells, porches, and your garage.
- Wireless cameras must be within the range of wifi. Wired cameras need access to the wired system.
- It is out of reach. Aim for a height above 10′ when possible. Remember, you’ll have to get to the camera to replace batteries if it doesn’t have a permanent power source.
- If you can only get one camera, point it at the front door and make sure it’s visible. According to a 2012 study by the University of South Carolina, about 60% of burglars were deterred by the presence of an alarm system, and a visible camera is part of their consideration about which house to target.
Consider Professional Installation Services With ONIT Home
Installing cameras can be simple, particularly for wire-free cameras with only one or two points to cover. The installation can also become time-consuming and labor-intensive if you elect for wired or complex systems. If you want to eliminate the hassle and ensure the best coverage possible, consider hiring ONIT Home’s security professionals. We’ll help you select the right equipment for your home, handle the installation, and provide 24/7 professional monitoring. When you are ready to protect your home, contact ONIT Home today for a free quote by giving us a call at 1-833-433-0331.